Category Archives: Beauty

The Shampoo v. “No-poo” Compromise

I’ve been on the crunchy lifestyle bandwagon for a while now. My mission to live a sustainable lifestyle has taken some unexpected turns. One of my favorite things to do has been replacing my beauty items with sustainable, homemade versions. In fact, I have a batch of homemade body butter cooling in the kitchen right now.

I’ve tried the so-called “no-poo” method (i.e. baking soda and water as a replacement for shampoo). Can I just take a moment to say what a horrible name that is!?! Okay, end rant. I tried the standard baking soda and water shampoo replacement method. Long story short, for whatever reason, this method did not work for me. I can’t pin the failure on the water, my hair type or the environment, or just the plain fact that it doesn’t work. My hair just felt thick and dirty, never that fresh and clean feeling. However, my fellow sustainable bloggers swear by it. It just did not work for me.

This failure spurred a desire to fix it. I could not simply go back to shampoo. I had to find some answer to a healthier method to cleanse my hair than the chemical-laden cocktail that was sold at the store. Organic versions are better, yet expensive and still don’t fix the problem of using detergent on my hair.

I am advocating against washing your hair with conventional shampoo. Why? Here are my reasons:

  • Shampoo strips your hair of its natural oils and moisture. Our hair actually produces its own natural oil which acts as a conditioner and moisturizer;
  • Conventional shampoo is toxic, see an article here; I don’t want to spread toxic chemicals that are known carcinogens onto my scalp each and every day;
  • It’s unnecessary. Before 1930, we didn’t even have what we now know as shampoo.

I have now been washing my hair with my “compromise” method for a few months. To be perfectly honest, I was skeptical and not sure if I would stick this one out. I think the method I have designed is a nice compromise between using organic shampoo and the baking soda method.

This method does take some getting used to. You will more than likely go through a bit of a greasy phase. If you experience this, have no fear, there is a natural dry shampoo method found here. Use this dry shampoo during the transition phase.

This is my compromise recipe:

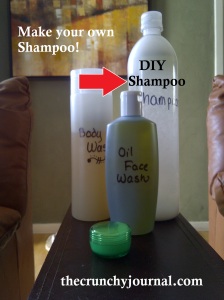
Shampoo

  1. Fill and 8 ounce squeezable bottle with water, leaving some room at the top. You can also re-use an old shampoo bottle or any other suitable container.
  2. Add 1 teaspoon of baking soda.
  3. Add 1 teaspoon of organic shampoo. I use this kind.
  4. Add 1/2 teaspoon of sea salt.
  5. Now shake to combine.

To use:

  • In the shower, I wet my hair thoroughly and massage my scalp to loosen any oil or dirt
  • Next, I squeeze my alternative solution onto my roots and scrub, scrub, scrub
  • I wash my face, allowing the mixture to remain on my hair for a few minutes
  • Then, rinse while massaging my scalp.
  • I’m still working on an alternative to conditioner … so stay tuned.
  • I then use my homemade body wash.

Let me know how this works for you! Everyone’s hair is different, so tweak the recipe as needed.

Until next time, I send you peace, love, and good energy.

~Sharon

DIY: All-Natural Toothpaste

For about a year now I have been making and using my homemade toothpaste. Most people cringe and wonder if it works. I am here to tell you that it does. I have never had a cavity, and my dental hygienist says my teeth and gums looks great.

Why did I stop using store-bought toothpaste? The answer is simple. I figured if the label says “do not swallow” and “if swallowed contact poison control” that it probably wasn’t a good thing to be putting in my mouth. It seems like a pretty easy task to keep our teeth clean, brushing and flossing and mouthwash isn’t too complicated of a routine, so why did toothpaste have to be complicated? Why does it have to contain sugar … something that causes tooth decay??? seems counter productive. Why does it have to contain nasty chemicals that can poison me? Why would I put that in my mouth? Okay, you get my point.

diy toothpaste

(this picture is from the first sample I made myself)

I’ve researched different toothpastes and tooth powders, tried some differing variations, and I have no concrete “recipe” to share with you. But here is my go to toothpaste ingredient list:

I usually make a large batch (a couple jars at a time), sometimes I make some to give to my friends to try. But here is my general method:

  1. Melt some coconut oil in a small bowl or right in your glass jar. If this is your first batch, just make a little bit to try it out, a few tablespoons will do.
  2. Now add enough baking soda to the toothpaste to make a paste. (the paste consistency will be determined by the temperature of your house. In the summer the toothpaste can be more liquidy due to the heat, and in the winter very hard due to the cold)
  3. Now add 10-20 drops of peppermint essential oil. (Obviously, more or less depending on how much you are making)
  4. Now add 5-10 drops of tea tree oil.
  5. If you need to make it sweet like the store bought kind, this is where you add the xylitol or stevia to your taste. I made mine sweet at first when I was transitioning to natural toothpaste, now I leave it out completely.

You can also add other cleaning agents. I have heard of ground sage and bentonite clay being added. Also, you can leave out the coconut oil completely and make a toothpowder. People add sea salt to some tooth powders. It’s all about experimenting to see what you like and can tolerate.

To use, I just dip my brush head into the jar and get some on the bristles. I also use an electric toothbrush. I feel like it does a better job of using the grit from the baking soda to get my teeth nice and clean.

I will also be putting up my recipes for mouthwash and retainer/denture cleaner!

Until next time, I send you peace, love and good energy.

~Sharon


DIY Beachy-Hair Mist

373

Ahhh Springtime. So close to summer. Time for lost clothing, shorts, hikes, and camping. It’s also that time of year for beachy, flowy hair. One thing that just makes me laugh is when people buy “Beach Spray” for their hair. Don’t be fooled! You’re buying salt water (with perhaps, a little hair spray) in a bottle – this is a very sneaky scheme. It’s easy to get scammed into buying that beautiful bottle of stuff that promises to make you look like you just returned from the beach.

Well, I have a surprise for you!!! You can make your own for pennies on the dollar.

You will need:

  • Spray bottle (use one that you already own by washing it out and reusing it instead of buying a new one.)
  • Water
  • Salt, natural sea salt preferably
  • Hairspray (try this natural DIY version)

Simply dissolve a teaspoon or two of salt into some warm water, add a little hairspray if you choose, shake, spray! Yes, that easy.

For me, I have stick-straight hair. I spray this on my dry hair and scrunch it up with my hands until the spray dries. It gives my hair a little more texture than it normally has. The more natural texture you have, the more wave you will see. Be careful though, the salt will dry out your hair. Be sure to properly moisturize your hair so you don’t damage your hair. Just because it is a natural product, does not mean that it will not damage your hair.

Have you ever made your own beach mist or hairspray? What have your results been? What kind of recipe did you use?

Until next time, I send you peace, love and good energy.

~Sharon

Cornmeal & Honey Scrub

honey2Getting back to basics can be the best way to take care of ourselves inside and out. I’m always looking for natural ways to take care of my skin and avoid the processed and chemical laden store-bought products. This recipe is a great way to refresh your skin by sloughing off dry skin to reveal and fresh and dewy face.

This recipe is from Stephanie Tourles book Organic Body Care Recipes:

This product leaves skin smooth, soft, and very hydrated. Because this scrub can be a bit runny and sticky, don a shower cap or wrap your hair in a towel before use. 

What you will need:

  • 1.5 teaspoons cornmeal
  • 1 teaspoon honey
  • 1/2 teaspoon water

In a small bowl, combine the ingredients thoroughly and allow cornmeal to absorb the liquid for 1 minute.  Using your fingers, gently massage onto the face and throat, lie back, and leave on for 15 minutes. Rise with warm water to revel your new dewy skin. 

Until next time, I send you peace, love and good energy.

~Sharon

Aloe Vera Toner

Hello everyone! Sorry I haven’t put up a tasty recipe in a while… I have been developing some new recipes for you and will post them in the very near future. In the meantime, enjoy another selection out of Stephanie Tourles’ book Organic Body Care Recipes:

aloe-vera2

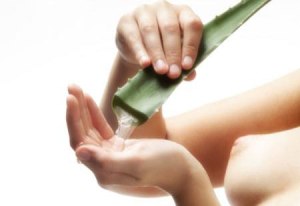
Aloe Vera juice makes a great all-over gentle toner. Contrary to popular belief, it’s a bit drying if used routinely and is thus most effective for oily, combination, and normal skins in need of calming treatment and gentle handling. Aloe is extremely soothing and healing when used to relieve environmental irritations and the itch from insect bites.

Note: Aloe vera may irritate very sensitive or dry, dehydrated, sunburned, or windburned skin. You can lessen the irritating effects and still benefit for its healing properties by diluting the juice or gel 50% with distilled water. Store the mixture in a small jar in the refrigerator and shake vigorously before each application.

You will need:

Pure aloe vera juice or gel, commercially bottled or fresh-picked leaf.

(I prefer this aloe gel from Mountain Rose Herbs. My Sweetie uses it everyday.)

  • recommended for: oily, acneic, combination, normal, or mature skin that is not dry; sunburned, windburned, or irritated skin
  • Use: daily 
  • Follow with: moisturizer
  • Prep time: none
  • Blending tools: none
  • Store in: refrigerator in original container or store cut leaf in a plastic bag.
  • Yield: 1 treatment

If using commercial juice or gel, follow label directions regarding storage; it almost always requires refrigeration. If using the gel from a leaf or your own alow plant, cut off the amount you are going to immediately need and store the remainder of the leaf in a plastic bag in the refrigerator. It will keep for about three days.

Application tips: Simply soak a cotton pad with the juice or gel and apply to skin as desired.

I don’t know about you, but I learned a lot about a lot from this recipe. I always thought aloe was a moisturizer … guess I was wrong! And now I know how to use it properly. 🙂

Until next time, I send you peace, love, and good energy.

~Sharon
Mellow Yellow Banana Cream Mask

I have been absolutely loving Stephanie Tourles’ book Organic Body Care Recipes. It is loaded with great information, an ingredient dictionary, and a whole bunch of simple and amazing recipes. I have chosen another one to share with you.

Bananas and cream will moisturize, hydrate, and pamper even the direst skin. Try to make this mask a healthy, yummy habit that your skin will relish. Note: Should a bit of this delectably scrumptious mask drip into you mouth, it’s fine to savor it!

What you will need:

  1. One 2 inch chunk of a very ripe banana 
  2. Cream, light or heavy
  • Recommended for: normal, dry, dehydrated, sensitive, sunburned, windburned, environmentally damaged, mature, or irritated skin.
  • Use: as desired
  • Follow with: moisturizer if necessary
  • Prep time: approximately 5 minutes
  • Blending tools: mortar and pestle or small bowl and fork
  • Store in: do not store, mix as needed
  • Yield: 1 treatment

Using a mortar and pestle or a small bowl and for, mash the banana with just enough cream until a smooth, spreadable paste forms.

Application tips: Safeguard hair and clothing prior to applying this potentially runny mask. Using your fingers, spread onto the face and throat, and recline for 20 to 30 minutes (mask will not dry). Rinse.

I hope you enjoy this all natural beauty mask!

Until next time, I send you peace, love and good energy!

~Sharon

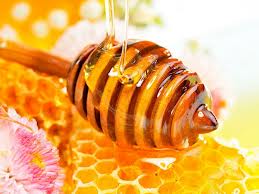
Honey Massage Mask

HoneyRecipe from Organic Body Care Recipes by Stephanie Tourles

This is a delicious, sweet way to soften, deeply hydrate, and moisture your skin. This treatment leaves skin with a rosy glow resulting from increased circulation.

You will need:

2-3 teaspoons of fresh, raw honey at room temperature

  • Recommended for: all skin types, especially dry, dehydrated, sunburned, windburned, mature, or environmentally damaged skin
  • Use: as desired
  • Follow with: moisturizer if necessary
  • Prep time: approximately 1 minute
  • Blending tools: small spoon
  • Store in: do not store, mix as needed
  • yield: 1 treatment

Application tips: Honey thins and get runnier as it warms to skin temperature, so be sure to wear a shower cap or pull your hair off your face and neck prior to application. Using your fingers, apply a very thin coat of honey to your entire face and neck. When the honey is spread evenly, it will bead on your skin much like water beads on your car after a rain shower. Leave on for 15 minutes or longer while you relax. Before rinsing, for about 5 minutes, begin to pat your skin lightly with your fingertips in quick tapping motions, as though you are playing the piano. Rinse using a very warm, damp cloth.

I hope you enjoy this recipe from the new body care book I recently purchased. I can’t wait to try out more recipes and share them with you.

Until next time, I send you peace love and good energy.

~Sharon


Eco Emi January 2013 – Unboxing

Check out what I got in this month’s Eco Emi box!

Until next time, I send you peace, love, and good energy!

~Sharon

Recycle, Re-use. Be crafty.

Due to a recent incident on my birthday, in which my car was broken into … and my very special friendship necklace was stolen … I found myself at the local bead shop perusing for an infinity charm to make some bracelets. Unfortunately, they did not have what I was looking for … but they did have some other beads I liked. So, $33 later I ended up at home with some waxed cotton string, a couple of strings of beads, a few jump rings, and clasps.

Being a Pinterest junkie, I have seen a ton of super cute DIY bracelet and jewelry ideas that I just had to try. Also, I should mention that I have a giant bowl on my dresser full of bracelets, cuffs and other old jewelry I have collected over the years. Soooo – I decided to raid my bowl for bracelets I don’t wear any longer to see which ones I could cut up and make into something new (because beads are expensive!).

And then, my living room started to look like this:20130114_121815Yes, that is my deviled-egg dish being re-purposed as a bead sorter.

So – I made these:20130114_122224 20130111_180436

The point of this post was not to show off killer crafty skillz … it was to get you thinking. It’s not just about making friendship bracelets from other stuff … it’s about recycling the old and making it into the new. Check out my Pinterest page to get some ideas about up-cycling your old things into new fun things that you will love!

How do you recycle and reuse in your house?

Until next time, I send you peace, love, and good energy.

~Sharon

All-Natural Dry Shampoo

603Dry shampoo has been all the rage in the trendy beauty industry. Unfortunately, these products are sold in aerosol cans and/or full of harmful ingredients. Basically, dry shampoo is a substance that absorbs the oil at the roots so you can leave the house without looking like a greasy mess when you don’t have time to shower. I was a huge fan of the popular brands until I learned what I was spraying on my head. I thought baby powder would be a good alternative until I realized talc was a carcinogen (and why are we putting this on our babies???!).

I began searching for a natural alternative for when I’m having one of “those” days or when I simply feel like giving my hair a break from washing. I live in the desert so if I wash my hair too frequently it gets all dry and frizzy – so dry shampoo is my friend.

It should also be explained that the oil that your head produces is good for your hair – it is our bodies way of naturally conditioning our hair.

Here’s the big secret: Arrowroot Powder

It is commonly used in cooking as a thickening agent … but is has many other uses that you can read on mountainroseherbs.com. I also buy my arrowroot powder from Moutain Rose Herbs – they have great quality products for great prices.

To use as dry shampoo:

  • a small container
  • an old make-up brush or other type of small brush
  • a small amount of arrowroot powder
  1. Put the arrowroot powder into the container.

Note: This is to be used at the roots of your hair. I only use this on the top of my head. I start from a part above my ears and work from one side to the other.

  1. Make a part. Dip the brush into the powder, shake off excess, and then dab the powder onto your roots. If you have dark hair like me, don’t be alarmed at the excess white powder – it will go away.
  2. Keep making parts about 1/4 to 1/2 inch apart and work over the top of your head to the other side. Concentrate on the most visible parts.
  3. Then, take your fingers and massage your roots.
  4. The powder should not be visible at the point. If it is, you can run your brush through to get the excess out.
  5. Your hair should be looking pretty darn good. I will say – it doesn’t have that freshly washed look – but it does help tremendously and it will get you through the day.
  6. Style as usual.

Have you ever used arrowroot powder? What for?

Until next time, I send you peace, love, and good energy.

~Sharon