Tag Archives: organic

The Shampoo v. “No-poo” Compromise

I’ve been on the crunchy lifestyle bandwagon for a while now. My mission to live a sustainable lifestyle has taken some unexpected turns. One of my favorite things to do has been replacing my beauty items with sustainable, homemade versions. In fact, I have a batch of homemade body butter cooling in the kitchen right now.

I’ve tried the so-called “no-poo” method (i.e. baking soda and water as a replacement for shampoo). Can I just take a moment to say what a horrible name that is!?! Okay, end rant. I tried the standard baking soda and water shampoo replacement method. Long story short, for whatever reason, this method did not work for me. I can’t pin the failure on the water, my hair type or the environment, or just the plain fact that it doesn’t work. My hair just felt thick and dirty, never that fresh and clean feeling. However, my fellow sustainable bloggers swear by it. It just did not work for me.

This failure spurred a desire to fix it. I could not simply go back to shampoo. I had to find some answer to a healthier method to cleanse my hair than the chemical-laden cocktail that was sold at the store. Organic versions are better, yet expensive and still don’t fix the problem of using detergent on my hair.

I am advocating against washing your hair with conventional shampoo. Why? Here are my reasons:

  • Shampoo strips your hair of its natural oils and moisture. Our hair actually produces its own natural oil which acts as a conditioner and moisturizer;
  • Conventional shampoo is toxic, see an article here; I don’t want to spread toxic chemicals that are known carcinogens onto my scalp each and every day;
  • It’s unnecessary. Before 1930, we didn’t even have what we now know as shampoo.

I have now been washing my hair with my “compromise” method for a few months. To be perfectly honest, I was skeptical and not sure if I would stick this one out. I think the method I have designed is a nice compromise between using organic shampoo and the baking soda method.

This method does take some getting used to. You will more than likely go through a bit of a greasy phase. If you experience this, have no fear, there is a natural dry shampoo method found here. Use this dry shampoo during the transition phase.

This is my compromise recipe:

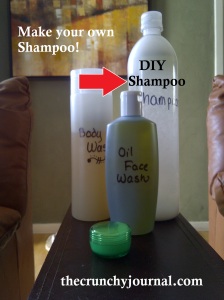
Shampoo

  1. Fill and 8 ounce squeezable bottle with water, leaving some room at the top. You can also re-use an old shampoo bottle or any other suitable container.
  2. Add 1 teaspoon of baking soda.
  3. Add 1 teaspoon of organic shampoo. I use this kind.
  4. Add 1/2 teaspoon of sea salt.
  5. Now shake to combine.

To use:

  • In the shower, I wet my hair thoroughly and massage my scalp to loosen any oil or dirt
  • Next, I squeeze my alternative solution onto my roots and scrub, scrub, scrub
  • I wash my face, allowing the mixture to remain on my hair for a few minutes
  • Then, rinse while massaging my scalp.
  • I’m still working on an alternative to conditioner … so stay tuned.
  • I then use my homemade body wash.

Let me know how this works for you! Everyone’s hair is different, so tweak the recipe as needed.

Until next time, I send you peace, love, and good energy.

~Sharon

DIY: All-Natural Toothpaste

For about a year now I have been making and using my homemade toothpaste. Most people cringe and wonder if it works. I am here to tell you that it does. I have never had a cavity, and my dental hygienist says my teeth and gums looks great.

Why did I stop using store-bought toothpaste? The answer is simple. I figured if the label says “do not swallow” and “if swallowed contact poison control” that it probably wasn’t a good thing to be putting in my mouth. It seems like a pretty easy task to keep our teeth clean, brushing and flossing and mouthwash isn’t too complicated of a routine, so why did toothpaste have to be complicated? Why does it have to contain sugar … something that causes tooth decay??? seems counter productive. Why does it have to contain nasty chemicals that can poison me? Why would I put that in my mouth? Okay, you get my point.

diy toothpaste

(this picture is from the first sample I made myself)

I’ve researched different toothpastes and tooth powders, tried some differing variations, and I have no concrete “recipe” to share with you. But here is my go to toothpaste ingredient list:

I usually make a large batch (a couple jars at a time), sometimes I make some to give to my friends to try. But here is my general method:

  1. Melt some coconut oil in a small bowl or right in your glass jar. If this is your first batch, just make a little bit to try it out, a few tablespoons will do.
  2. Now add enough baking soda to the toothpaste to make a paste. (the paste consistency will be determined by the temperature of your house. In the summer the toothpaste can be more liquidy due to the heat, and in the winter very hard due to the cold)
  3. Now add 10-20 drops of peppermint essential oil. (Obviously, more or less depending on how much you are making)
  4. Now add 5-10 drops of tea tree oil.
  5. If you need to make it sweet like the store bought kind, this is where you add the xylitol or stevia to your taste. I made mine sweet at first when I was transitioning to natural toothpaste, now I leave it out completely.

You can also add other cleaning agents. I have heard of ground sage and bentonite clay being added. Also, you can leave out the coconut oil completely and make a toothpowder. People add sea salt to some tooth powders. It’s all about experimenting to see what you like and can tolerate.

To use, I just dip my brush head into the jar and get some on the bristles. I also use an electric toothbrush. I feel like it does a better job of using the grit from the baking soda to get my teeth nice and clean.

I will also be putting up my recipes for mouthwash and retainer/denture cleaner!

Until next time, I send you peace, love and good energy.

~Sharon


Apple Ring Pancakes

On the hunt for a healthier breakfast and craving pancakes simultaneously lends itself to a predicament that most of us face. What to eat for breakfast that’s healthy and tasty?

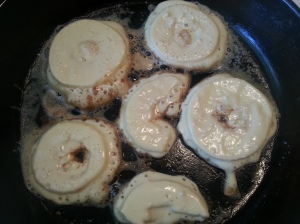
As I perused my kitchen for my available selection of ingredients, I noticed I had some apples, and thought to myself “What if I dip the apple in the pancake mix and then cook it?” And this is what happened:

What you will need:

  • Enough pancake mix for your family or you can use this recipe to make pancakes from scratch. I used 1 cup of pancake mix and prepared it according to the directions.
  • Enough apples for your family, peeled, cored, and sliced into rings. I used one large apple for me and Sugar.
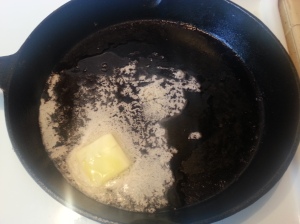
  • Hot buttered skillet.Buttered skillet
  • Real maple syrup.

Method:

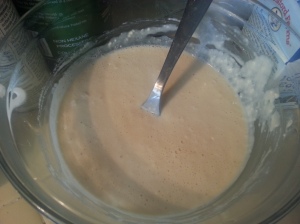
  1. Prep pancake mix. Batter
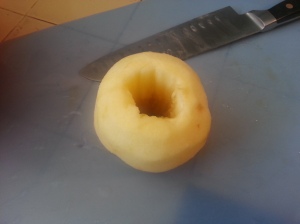
  2. Peel, core, and slice apples into 1/4 inch thick rings. Apple
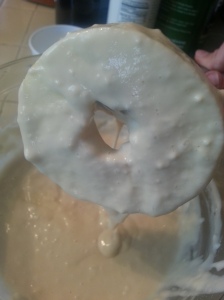
  3. Dip the apple ring in the batter. Let the excess drip off. Apple dip
  4. Cook in a buttered skillet until golden brown. Apple fryApply cooking
  5. Serve with maple syrup and your favorite sides. Breakfast 2
  6. Mmmmmmm!

Until next time, I send you peace, love and good energy!

~Sharon

Coralganics

I was just scrolling through my Facebook feed and came upon this wonderful video of a little girl named Coral who has some important questions for Dr. Oz. Since I haven’t watched TV in over 3 years, I don’t know who Dr. Oz is, but I love this little girl’s message. More children should be as educated about our food supply as she is. Check it out!

Until next time, I send you peace, love and good energy!

~Sharon

Cornmeal & Honey Scrub

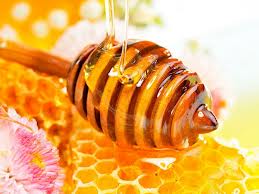
honey2Getting back to basics can be the best way to take care of ourselves inside and out. I’m always looking for natural ways to take care of my skin and avoid the processed and chemical laden store-bought products. This recipe is a great way to refresh your skin by sloughing off dry skin to reveal and fresh and dewy face.

This recipe is from Stephanie Tourles book Organic Body Care Recipes:

This product leaves skin smooth, soft, and very hydrated. Because this scrub can be a bit runny and sticky, don a shower cap or wrap your hair in a towel before use. 

What you will need:

  • 1.5 teaspoons cornmeal
  • 1 teaspoon honey
  • 1/2 teaspoon water

In a small bowl, combine the ingredients thoroughly and allow cornmeal to absorb the liquid for 1 minute.  Using your fingers, gently massage onto the face and throat, lie back, and leave on for 15 minutes. Rise with warm water to revel your new dewy skin. 

Until next time, I send you peace, love and good energy.

~Sharon

How to Make Your Own Organic Kale Chips!

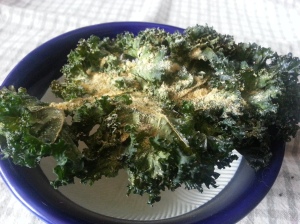
Kale ChipsI have fallen into the kale chip craze, and I may need a rehabilitation program to get over how amazing this snack is. I wasn’t sure if I would be a fan of the crispy version of the bitter “super food,” so I journeyed to my local grocery store to purvey their selection of kale chips.

One brand was a curry flavor and did not look appetizing. Next, I found a vegan cheese version called Brad’s Raw Leafy Kale Chips. This one looked yummy, plus they were on sale, so those came home with me. As I was cooking dinner that night, I popped open the box and started munching on these leafy chips … and to my surprise, they were delicious! I was surprised by the flavor and how addicting they were. I nearly ate the entire box while making dinner!

While I was impressed with this crispy delights, I was not impressed with the price tag of nearly $8 per 2.5 ounce box. So, I did what any modern urban hippie girl does … she makes her own. Now, this was my first stab at it. I’m sure I could improve the recipe, finagle with with type of kale leaf, change up the spice blend, but I have to say … I am pleased with my first batch, and have been happily munching on my green crisps ever since.

What you will need:

  • one bunch of organic kale, any kind
  • olive oil
  • salt
  • pepper
  • garlic powder
  • smoked paprika
  • nooch
  • cooling racks

The Method:

  1. Preheat oven to 175 degrees F
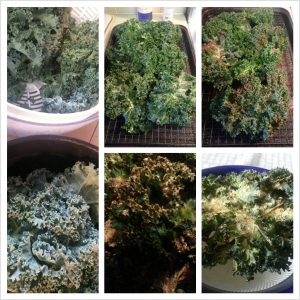
  2. Wash kale leave thoroughly. Trim off large stems/ends. Dry leaves as best you can.
  3. I left my leaves whole since I have a very curly kale to work with. But you could tear the leaves into more bite sized-pieces.
  4. Put kale into a large bowl and drizzle with a bit of olive oil. It does not take a lot of oil to give the kale a good coating.
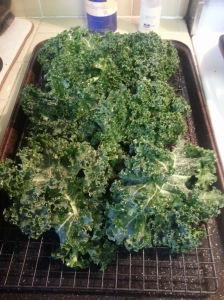
  5. Lay your leaves out in a single layer on the cooling racks.552
  6. Sprinkle with desired spices. I did two difference versions: 1. salt, pepper, nooch 2. salt, pepper, garlic powder, smoked paprika, tiny bit-o-nooch.
  7. Put the racks of kale into the oven for 2-3 hours. I think about 2.5 hours was the best for my chips … just keep an eye on them. You can check for done-ness by sampling a small edge. You want them crisp, but not too crisp.560

I will have to say – both flavors are phenomenal, and you can come up with a million more flavor combinations.

This is something that you can easily make while you’re studying, cleaning the house, or just relaxing for the evening.

If you’ve ever had en experience with kale chips, please comment below. Did you like them/not like them? Have you ever made them yourself? Let me know – I would love to hear your experiences.

Until next time, I send you peace, love, and good energy.

~Sharon
Creamy Avocado Spread/Dip (Vegan)

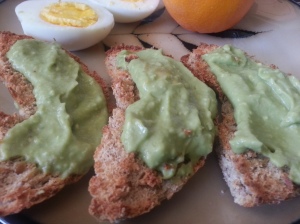
Ever on the search for a better breakfast alternative, I dreamed up this creation to satisfy my desire to eat more avocados, as well as an alternative for a breakfast/snack/dip that was savory, but not unhealthy.

Avocados are so good for you: according to californiaavocado.com “Avocados provide nearly 20 essential nutrients, including fiber, potassium, Vitamin E, B-vitamins and folic acid. They also act as a “nutrient booster” by enabling the body to absorb more fat-soluble nutrients, such as alpha and beta-carotene and lutein, in foods that are eaten with the fruit.”

There’s the facts … here’s the spread:

What you will need:

  • 1-2 avocados
  • a drizzle olive oil
  • lemon/orange juice
  • a splash of dairy-free milk (optional)
  • spices: salt, pepper, garlic powder, smoked paprika

The Method:

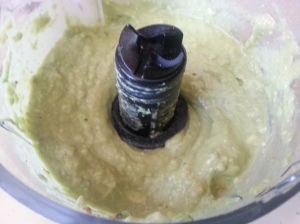
  1. Half the avocados and scoop out the flesh into a food processor. (I used 1.5 small avocados)
  2. Pulse until it starts to get creamy. 562
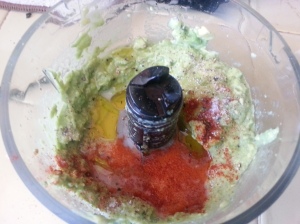
  3. Add the lemon/orange juice, a drizzle of olive oil, and the spices of your choice. Pulse until creamy.561
  4. If it is still really thick, you can thin it with the diary-free milk, or the olive oil.

564

Serving Suggestions:

  • Spread onto toast for a great breakfast or snack. 
  • Spread onto a sandwich in place of mayonnaise.
  • Put into a bowl for dipping chips or veggies.

Until next time, I send you peace, love, and good energy.

~Sharon

Hearty Chickpea & Veggie Salad with Tahini Dressing

I have said it before and I will say it again: I hate salads! I don’t really know why … they taste good. I suppose it is because I find chomping on a bunch of leaves less-than satisfying. Thus, I have been on a very serious quest to make a salad that I want to eat … not just something I “get through.”

My Sweetie has always told me that I have to put fun toppings on it so I will eat it. Well, I took his advice and swapped it. I have created a salad that is MOSTLY toppings with salad leaf sprinkles… yeah … you read that right. My creation could have a hundred or more variations to suit your tastebuds …

What you will need:

  • a giant bowl
  • a can of chickpeas, drained and rinsed (I use an extra-large can – or you could use two cans if you like chickpeas as much as I do)
  • avocado, chopped
  • a large tomato, chopped
  • a large cucumber, chopped
  • kale, spinach, or you leaf of choice
  • fresh herbs such as parsley and cilantro
  • goat cheese crumbles to garnish
  • flax seed to garnish
  • other yummies: broccoli, seeds, nuts

Tahini dressing:

  • 1/3 c. tahini
  • 4-6 T. of olive oil
  • 1 lemon, juiced
  • 1/4 c. water
  • salt & pepper to taste
  • other yummies (a pinch or two): cumin, smoked paprika, ground coriander, turmeric, garlic powder, cayenne

Assembly:

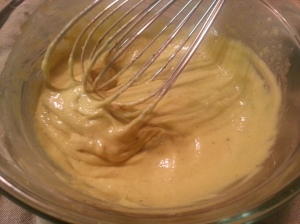
  • Whisk tahini dressing ingredients together in the bottom of the giant bowl.
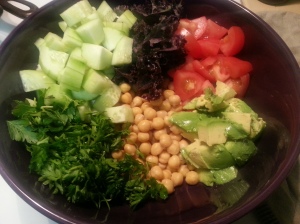
  • Add chickpeas, avocado, cucumber, tomato, and herbs.
  • Tear small pieces of kale on top. (I used purple kale – YUM!)
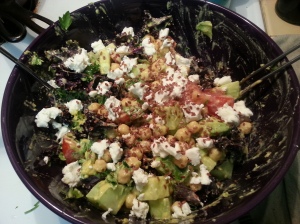
  • Toss. Add goat cheese and flax seeds.
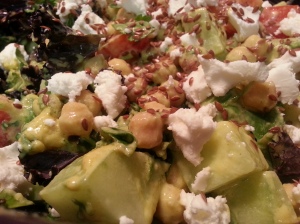
  • Boom! Salad of many toppings with a little bit of leaf. MAGIC!

016015017018

I find this recipe to be hearty, satisfying, and filling. It is also versatile because you can take what ever your favorite salad toppings are and turn them into the main event. Have fun salad-ing!

Until next time, I send you peace, love, and good energy!

~Sharon

Aloe Vera Toner

Hello everyone! Sorry I haven’t put up a tasty recipe in a while… I have been developing some new recipes for you and will post them in the very near future. In the meantime, enjoy another selection out of Stephanie Tourles’ book Organic Body Care Recipes:

aloe-vera2

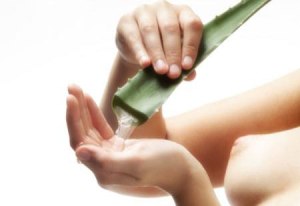
Aloe Vera juice makes a great all-over gentle toner. Contrary to popular belief, it’s a bit drying if used routinely and is thus most effective for oily, combination, and normal skins in need of calming treatment and gentle handling. Aloe is extremely soothing and healing when used to relieve environmental irritations and the itch from insect bites.

Note: Aloe vera may irritate very sensitive or dry, dehydrated, sunburned, or windburned skin. You can lessen the irritating effects and still benefit for its healing properties by diluting the juice or gel 50% with distilled water. Store the mixture in a small jar in the refrigerator and shake vigorously before each application.

You will need:

Pure aloe vera juice or gel, commercially bottled or fresh-picked leaf.

(I prefer this aloe gel from Mountain Rose Herbs. My Sweetie uses it everyday.)

  • recommended for: oily, acneic, combination, normal, or mature skin that is not dry; sunburned, windburned, or irritated skin
  • Use: daily 
  • Follow with: moisturizer
  • Prep time: none
  • Blending tools: none
  • Store in: refrigerator in original container or store cut leaf in a plastic bag.
  • Yield: 1 treatment

If using commercial juice or gel, follow label directions regarding storage; it almost always requires refrigeration. If using the gel from a leaf or your own alow plant, cut off the amount you are going to immediately need and store the remainder of the leaf in a plastic bag in the refrigerator. It will keep for about three days.

Application tips: Simply soak a cotton pad with the juice or gel and apply to skin as desired.

I don’t know about you, but I learned a lot about a lot from this recipe. I always thought aloe was a moisturizer … guess I was wrong! And now I know how to use it properly. 🙂

Until next time, I send you peace, love, and good energy.

~Sharon

Mellow Yellow Banana Cream Mask

I have been absolutely loving Stephanie Tourles’ book Organic Body Care Recipes. It is loaded with great information, an ingredient dictionary, and a whole bunch of simple and amazing recipes. I have chosen another one to share with you.

Bananas and cream will moisturize, hydrate, and pamper even the direst skin. Try to make this mask a healthy, yummy habit that your skin will relish. Note: Should a bit of this delectably scrumptious mask drip into you mouth, it’s fine to savor it!

What you will need:

  1. One 2 inch chunk of a very ripe banana 
  2. Cream, light or heavy
  • Recommended for: normal, dry, dehydrated, sensitive, sunburned, windburned, environmentally damaged, mature, or irritated skin.
  • Use: as desired
  • Follow with: moisturizer if necessary
  • Prep time: approximately 5 minutes
  • Blending tools: mortar and pestle or small bowl and fork
  • Store in: do not store, mix as needed
  • Yield: 1 treatment

Using a mortar and pestle or a small bowl and for, mash the banana with just enough cream until a smooth, spreadable paste forms.

Application tips: Safeguard hair and clothing prior to applying this potentially runny mask. Using your fingers, spread onto the face and throat, and recline for 20 to 30 minutes (mask will not dry). Rinse.

I hope you enjoy this all natural beauty mask!

Until next time, I send you peace, love and good energy!

~Sharon